Steps for growing oyster mushrooms
Steps for growing oyster mushrooms
Thinking of growing oyster mushrooms at home? Looking to earn some extra money or grow food even under unfavourable weather conditions or maybe you are looking to become a mushroom farmer.
Irrespective of your reason, you have made the right choice. Oyster mushrooms being relatively easy and quick to grow and low in maintenance, they are the perfect choice for beginners. And … they taste delicious!!
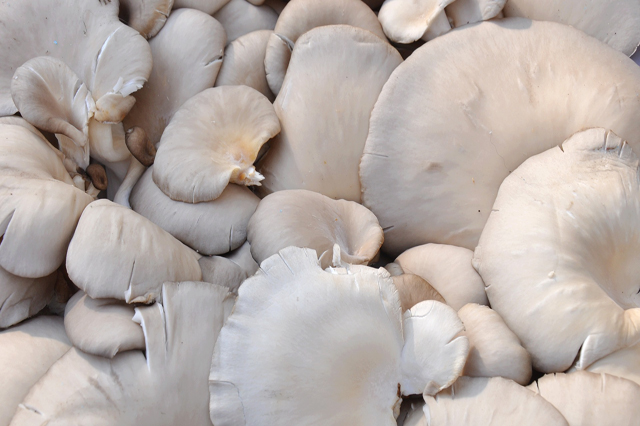
Oyster mushrooms come in various shapes and colours and are naturally appealing. Apart from the money being made, there is a satisfaction in twisting off a mushroom that you have laboriously grown.
In the initial stages, there is a bit of labour involved as you have to prepare the growing material. But once you get into the process, it is easier than raising other mushrooms.
Let us take a look at how oyster mushrooms can be grown using substrates made of straw or sawdust. This process makes sure that the environment is more controlled resulting in increased production and more returns on the investment.
Different Types of Oyster Mushrooms
Various types of oyster mushrooms, each having its own distinct colour and flavour are available.
Blue Oysters (Pleurotus ostreatus var. columbinus)
At times, referred by the name of blue pearl oysters, their rapid growth is the reason for their popularity. Tolerant to cooler temperatures, these mushrooms can grow in temperatures from 45°F to 65°F, though a temperature of at least 60°F is necessary for fruiting to take place.
Although blue oyster mushrooms can be grown indoors, they require good air circulation and fare better outside.
Golden or Yellow Oyster (Pleurotus citinopileatus)
A beautiful rich yellow colour, this mushroom has a flavour that is stronger than the other types. These mushrooms grow abundantly on decaying wood in the wilderness in Japan and Northern China.
The yellow oyster mushroom grows well in substrates of straw or sawdust. Their conversion rate is high meaning they utilise the nutrients aptly and are very fertile.
Pink Oyster (Pleurotus djamor)
Considered the favourite of many chefs, they are pink in colour and their mild, woody flavour is what makes them so popular. Vigorous in growing, the pink oysters fruit between 21 to 28 days.
Pink oysters can be grown in greenhouses (or even in bathrooms) as they prefer temperatures above 60°F. They can be grown either on straw or on sawdust. When grown on straw, they show the tendency of producing a number of small mushrooms. When grown on sawdust, they produce larger mushrooms but fewer in number.
King Oyster Mushroom (Pleurotus eryngii)
Growing with a round cap and large stem, this variety can become quite large weighing up to a pound. Slower to grow than the other varieties, they grow well in sawdust and do well in a casing layer. This variety of oyster mushroom is more susceptible to blotch.
The King oyster has a mild flavour and is perfect when you require something that is meatier and will take on flavouring.
Phoenix Oyster (Pleurotus pulmonarius)
Alternatively known as the Indian oyster mushroom, this brown coloured mushroom is easy to grow and matures in less than a week. These mushroom grow well in straw and requires warmer conditions for fruiting than the other mushrooms, thereby making it an ideal mushroom to grow in summer. These mushrooms have a mild anise flavour and are firm and fleshy.
Getting Started
A few terms one should know about before starting to grow mushrooms
- Spawn: Basically the mushroom seed, spawn is the living fungal culture that will be attached to a growing medium
- Substrate: Substrate or medium is the material into which the mushroom seeds are placed and that feeds the mushrooms when they grow
- Inoculation: It is the process of adding spawn to the substrate
- Mycelium: Thread like spawn filaments that join together forming a colony are known as mycelium
How to Plant Oyster Mushrooms
You can choose from various mediums when growing oyster mushrooms. Straw and sawdust are the most popular and reliable mediums or substrates, though cardboard and cotton waste are also being used by certain people. Pre-made substrates can also be purchased from stores.
Straw
- Cut the clean straw into pieces 1 – 3 inches thick. A wood chipper can be used to cut the straw
- Take a large vessel filled with warm water that has a little bit of dish soap mixed into it. Add the straw to the soapy water and swish it around. After a couple of minutes pour out the soapy water.
- Rinse thoroughly with clean water.
- Pasteurize the straw by cooking it in a large vessel filled with water and boiling it up to 150°F.
- Drain and place the straw on a clean, disinfected surface until it cools
Initially, it may look like a huge amount of effort is involved, but studies has proven that production is maximised by a sterile environment. If you intend to grow mushrooms in multiple bags, then an assembly line set up would be the perfect system to follow. Often, people who grow mushrooms professionally purchase an autoclave to increase the speed of the process.
If you are experimenting and plan to use just a couple of bags, then a microwave can be used to sterilize the straw.
The important thing is to prepare only as much as you intend to use immediately.
Sawdust or Wood Pellets
An equally good medium when growing oyster mushrooms, the sawdust must come from hardwoods like hickory or oak. You can acquire sawdust from these trees by contacting local sawmills and working out a deal.
Unlike straw, sawdust needs to be sterilized at a higher temperature as it could contain mold spores that could affect the growth of the mushrooms.
- The sawdust should be boiled in water and left to cook for an hour
- Alternatively, the sawdust can be soaked in a high pH lime bath for at least 18 hours
- Cool the sawdust, if necessary
- Drain using a metal colander
Alternatively, small bunches of sawdust can be microwaved.
Hardwood pellets that can be used in wood smokers are a good substitute as you need not sterilize them. Before using the hardwood pellets, soak them in warm water to break them down.
Where to acquire Spawn
Spawn can be purchased online from a mushroom provider. Grain spawn in various sizes as well as those for straw or sawdust substrates can be purchased online.
Generally shipped on rye grain, grain spawn is an actively growing mycelium. They are different from plugs that are used to inoculate logs when growing mushrooms like shiitake mushrooms.
Inoculation
Allow your substrate to cool and remember to check that the moisture level is correct. The substrate should bind in your hand when squeezed and a little bit of water should drip out slowly. If the water coming out when squeezed is too much, then the substrate is too wet. If there is no water dripping out, then your substrate is very dry.
Once the moisture level is checked, the next step is to add the spawn. For twenty pounds of substrate, about three pounds of spawn can be used. Break up any clumps and mix it thoroughly. Once everything is mixed, it can be placed in the bags. Bags can be purchased from companies that supply mushrooms or you can use large 2 gallon plastic bags that are available at any box store.
Often, the mushroom bags already have holes in them. If you are using regular plastic bags, then you will need to make holes every 2 inches along the bottom and sides of the bag.
You can relax once the inoculation part is done with as the tough part of growing mushrooms is over.
Care for the Oyster Mushrooms
Incubation
To grow, mushrooms need to be incubated. To incubate, pick a warm and dark area with temperature at about 65°F – 75°F and place your bags in it.
A garage, shed or dark closet would be dark enough. It is also possible to grow oyster mushrooms in greenhouses that have shade cloth covering. Shade cloth that has at least 50% shade is recommended.
As mushrooms require adequate air circulation, a fan or two can be set up if required. Air should not be blown directly on to the bag but circulate air around the room. If there are large fans in your greenhouse, then it is recommended that the bags be placed at least 10ft apart.
Mushrooms do not like to be pushed around much. So, remember to keep them towards a corner or in some place where they are not bothered much.
Fruiting
Depending on the variety of mushroom, after about 3 – 4 weeks, a good colony would have been established by the mycelium. This can be recognized by the material inside the bag turning white in colour.
It is at this point that the colony will start fruiting. You can see pins or fruit buds coming out of the holes punched in the bag.
Your mushrooms can be coaxed into producing fruit by applying a light mist of warm water on them. And, it is also the perfect time to allow indirect sunlight to fall on the bags. A window that faces north is the perfect solution.
To enhance air circulation thereby replicating the conditions under which a mushroom grows in the wild, cut a slit into the bag.
The mushrooms need constant checking during this phase as it takes about 5 – 6 days for them to reach the size that is perfect for harvesting. Once a mushroom has been harvested, the pins that are very small will continue to grow outside of the bag. The mycelium will continue to produce fruit for several months before it runs out of energy.
What to do Once the Bag is Spent
Even after the bags are exhausted, one method to continue growing oyster mushrooms is to place it in the compost pile. The process of composting warms and nourishes the mycelium.
They will continue their growth in the pile and can begin to fruit again. When growing mushrooms outside in this manner, it is important to keep monitoring them. They can grow very fast and split or dry out during sunny days or they can become soggy and degrade during rain.
The used up mushroom bag without the plastic can be used as a nutritious additive to the vermicomposting bin.
Oyster Mushroom Kits
If you wish to make your work easy, you can purchase oyster mushroom kits from stores. A great advantage of such kits is their ease of use as you get them sterilized with pre-inoculated and colonizing mushrooms.
A disadvantage is that mushroom kits, particularly the good quality ones can be pretty expensive and they have lesser options in variety. Certain times, the cheaper kits are not worth the money spent as they may not produce much. It is advisable to read reviews and purchase from a reputed company.
Problems
Fruiting Problems
Drying Out – Spray your mushrooms or substrate with water if they start drying out
Small Heads – Too much of carbon dioxide can cause longs stems and small heads. To increase the exchange of air, open a door or window several times in a day.
Mold
Avoiding mold is the biggest challenge when it comes to growing oyster mushrooms in bags. It is a fact that a warm, moist environment is what fungi and molds look out for and that is what we create to grow mushrooms.
Mold is present everywhere. The reason for their taking hold could be due to their not being wiped out during the cleansing and sterilizing stage or they could have been introduced into the environment through daily activity.
A small patch of mold can be simply cut out and removed. But, if your whole bag has turned green, then it is better to just throw it into the compost pile.
Blotch
A bacterial disease, blotch causes the formation of lesions on the cap and stem of mushrooms. If you are struggling with a blotch problem, spray your mushrooms with chlorinated water and allow the mushrooms to dry between each spraying.
Gall Gnats
Though not as common as the occurrence of mold, the growth of mushrooms can be damaged by insects. Gall gnats or Cecidomyiidae are small flies that eat the underside of the mushroom.
The best way to prevent gall gnats is to keep the growing area clean. Sticky traps can be used to trap flying insects. Make sure not to spray the mushrooms with pesticides as mushrooms are very sensitive to them.
Black Scavenger Flies
The black scavenger fly (Scatopsidae) feeds on the decaying plants and dung. They can be controlled using the same methods used for gall gnats.
Harvesting and Storing
The time to harvest mushrooms is before they start to drop their spores. When the outer edges of the head begin to curl, you can understand that the mushrooms are ready to drop spores. Another method to identify when they are ready to harvest is when the mushroom head begins to flatten and stops growing.
To harvest a mushroom, cut it with a knife or twist it off.
Mushrooms, in general, do not have a long shelf life. Oyster mushrooms are a little better due to the thick walls they possess.
The mushrooms can be stored in the refrigerator in paper bags. Oyster mushrooms tend to grow in groups and if you produce too many, they can be preserved by drying.
Oyster mushrooms have a high protein content – 30% by dry weight. Low in cholesterol, oyster mushrooms also contain a molecule named lovastatin that helps to bring down cholesterol levels. Mushrooms being thick and meaty can be substituted for meat in soups and stews and are hence popular among vegetarians and people who are on a vegan diet.
It is better to eat oyster mushrooms after cooking as eating fresh mushrooms can make you feel sick. The oyster mushrooms contain ostreolysin, a protein that can be toxic when eaten raw in huge quantities. To avoid this, cook the mushrooms to about 140°F.
Recently Added
Categories
- Arts And Humanities
- Blog
- Business And Management
- Criminology
- Education
- Environment And Conservation
- Farming And Animal Care
- Geopolitics
- Lifestyle And Beauty
- Medicine And Science
- Mental Health
- Nutrition And Diet
- Religion And Spirituality
- Social Care And Health
- Sport And Fitness
- Technology
- Uncategorized
- Videos